


The World Around Me
Look around you, there is interest everywhere but most people do not notice it. It is your job to highlight the beauty that surrounds us on a daily basis.
With this in mind, I set out to create a landscape masterpiece, or at least try to anyway. The first thing that was suggested that I do was to experiment a little with the f-stop on a scene, just so I could get a feel of what f-stop to use when trying to encapsulate everything in a frame.
First of all, I mounted my camera on a tripod, and switched it over to aperture priority mode.
i then set up a scene where a number of objects are placed from foreground to background. I then framed the camera so that there were many things in frame, and then I focused the camera manually to focus on one object (I put the lens on manual focus so that the camera didn't try and focus on something else). I then began taking pictures, each one with an increasing f-number. I began with a picture of f/5.6, and I progressed incrementally onto a photograph of f/36, so I can compare them. The results of this shoot is below.
 |  |  |
|---|---|---|
 |  |  |
 |  |  |
 |  |  |
 |  |  |
 |  |

As you can see, on the left, there is a big difference between the biggest f-stop number (left) and the smallest f-stop (right) number has. On the right, only a small portion of the image is in focus, whereas pretty much everything is in focus on the left.
The next thing that needed doing was the creation of a mind map. How else am I supposed to come up with different ideas? So, I grabbed the nearest notepad to me, and began scrawling ideas.
The first thing that I wanted to explore was landscape photography (this is a landscape photography project after all). There are two artists that particularly stuck out to me, and these were the photographers Ansel Adams, and Charlie Waite.
The next thing that I wanted to explore was 'Urban Landscape Photography', which also links in with the 'Capturing Town Center' branch I made.
There are a couple of things that I need to remember when shooting Urban Landscapes, and that is a list of fundamentals that Urban Landscape Photography is made up of.
The first thing is that it is able to describe a town or city through what is shown through a photograph. This is quite obvious, because if you take photographs of negative things in the town or city, then it will create a perspective of that town showing it in a bad light, but if you take photographs of positive things in the town or city, then people will see those positive things and see this town or city in a positive way.
The second thing to remember is that it is representative of an attempt to understand our experience of the city. This means that the photographs that someone takes of a town or city represents their time spent in the city. For instance, one photographer might take pictures of monuments or popular areas because they're new to the area, but if a photographer takes a picture of a less well known area in town, of a small nook unknown to the majority, then it shows that this person has been here a long time. This can also link in to the first point, because if someone's experience of a town or city was a positive one, then they will subconsciously photograph the positive things, etc.
The third thing to keep in mind is that it shows a dedication to the subject shown through the body of work, rather than isolated images. This is quite important, as you would get more of a point across through a selection of images rather than just one.
With Urban Landscape Photography, it is also important to focus on structures or processes rather than the people in it, and it can also either focus on details, or a broad view.
Earlier, I mentioned that I wanted to look at two different photographers, Ansel Adams, and Charlie Waite.


Charlie Waite is perhaps my favourite landscape photographer of the two. His work uses light and shade in such a way that it makes reality look like a painting. This photographer was born in England, and he initially worked in television before moving onto photography. This guy has a way with photography that makes his work a combination of "graphic finesse with an almost spiritual quality of calm and serenity."
Below is a collection of my favourite images from Charlie's website, which you can access by clicking the link above.
 |
|---|
 |
 |
 |
 |
As you can see here, this photographer has a sort of style to his work. You can see in most of these photographs that they are strong in using the rule of thirds, and leading lines also. In the first image especially, (the one with the blue sky, green grass, and white house) the rule of thirds is used, as you can tell by the grass and house taking up a third of the photograph.
This photographer also uses symmetry lines, which is a line that goes straight through the middle of the photograph, and a reflection is made by water or something reflective.
Leading lines are also shown, which can be useful to naturally lead the eye to a particular point. There are also diagonals used, which can be useful to create intrigue (but don't always use the Rodchenko type obscure angles all the time, sometimes that can create an unnatural and unappealing feel to the photograph).
He also uses patterns in his work, which create intriguing textures, which draw the viewer in as they are appealing to look at.
The one thing that this particular photographer doesn't really utilise is the Golden Ratio, but that's only because he shoots his photographs using a Hasselblad camera that shoots in 6x6, so there isn't any feasible way he can fit the rectangular shape of the Golden Ratio in the photograph.
This photographer shoots mostly in black and white, (he used colour film many times, but he felt more strongly toward black and white) which I think creates a more dramatic effect than the colour (however, colour can be very useful sometimes to convey feeling or to make something stand out).
This photographer constructed something called 'The Zone System' with his friend Fred Archer, and this system allows you to determine proper exposure and adjust the contrast of the final print. He also founded the photography group 'Group f/64', which contained Willard Van Dyke, and also Edward Weston.
 |
|---|
 |
 |
 |
 |
This photographer's landscape photography relies less on lines of symmetry, but mostly on leading lines and patterns.
Also, on one of the photographs, you can see that he set his shutter speed to slow, because the water running down the stones, it creates a milky white texture to the water.
Like I said earlier, I reckon I prefer Charlie's photography over Ansel's, because of the colours, (Ansel used a red filter with a black and white camera to heighten contrast) and how simple his photography is. I also like how Waite sticks to the conventions of Landscape Photography, whereas Adams seems to want to do his own thing (gathered from the selection of photographs I chose from him anyway).
Studying these two photographers helped me to see what I need to look for in a landscape scene and how to photograph it, but, as I've said before, I would like to pursue Urban Landscape Photography, so I set out to look for an urban landscape photographer.

This photographer is a fine-art colour photographer, who has several pieces in several different high-end galleries, lime the MOMA, and the Getty Center. This photographer has also inspired several other colour phototographers, like Andreas Gursky for example. The two pictures of his that I will be talking about are from a series called 'American Prospects', of odd and intriguing moments that he had come across on a road trip that he had.
 |
|---|
 |
The first photograph, entitled 'Pumpkins and Fire', (© Joel Sternfeld. 1978, McLean, Virginia) You see a bunch of pumpkins in the foreground, a few are intact, but a lot of them are squished. This gives the photograph a rather ominous feel, like doom is imminent. Also, this is amplified by the fire in the background, which is a similar shade of orange in the foreground. This links the background up with the foreground, which is important in urban landscape photography.
The second image, called 'Elephant in the Road', is a rather odd photograph of an elephant lying in the road. This photo is quite unsettling, because you can see that everyone outside and in the cars are trying to figure out what to do with the elephant. This works well because the elephant doesn't stand out in the image, but the leading lines in the road lead your eyes to it.
So, with all of this in mind, I went to go take my photographs.
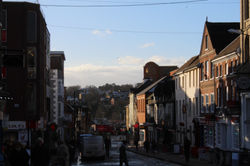
I had checked the weather online, and it said that there was going to be 40% cloud cover on the day that I was going to go out, so I decided to go. I probably should've checked the temperature as well though, because it was very cold, and since my tripod that I was using was made of metal, my fingers became very cold. This left me to be unable to operate the camera properly, and the tripod would be slightly tilted as a result. Regardless, I walked around town center, and took some photographs. There were several problems here, the first being that there was a couple of pieces of dust that had settled on the lens that I didn't notice, so there is the same black blobs on almost every photograph. This isn't a big deal though, because I can remove them in Photoshop later. The one big issue that I had when taking these photos is that because it was so cold, I wanted to get home where it was warm, therefore I was a little sloppy in my photography. Anyway, below are the photographs I took for this project.
 |  |  |
|---|---|---|
 |  |  |
 |  |  |
 |  |  |
 |  |  |
 |  |  |
 |  |  |
 |  |  |
 |  |  |
 |  |  |
 |  |  |
 |  |  |
 |  |  |
Then, I picked out my 3 favourite photos (by favourite, I meant the best looking). These were IMG_1769, IMG_1791, and IMG_1801. The first image, IMG_1769, was the first image I took, and somehow is the only photograph that doesn't have any marks made by the dust on the lens on it. Besides that though, I picked it because I liked how the castle looked in the background. However, I do believe that it could do with some fixing. First of all, we need to fix some composition issues. Firstly, the shot is a little skewed, and could do with tilting to the right a couple of degrees. I think that this was due to the tripod being on an uneven surface. The second thing is that the subject (the castle) isn't really abiding by the rule of thirds, so if we crop the image so that the castle is more over to the left, then I think that it would look a lot better. Secondly, I think we need to fix the colours, because it looks a little grey. Maybe I should touch up the sky a bit, and raise the saturation for everything else.
I opened up Pixlr again, and went ahead and started editing. I pretty much just fixed everything that I mentioned needed fixing in the paragraph above, so if you want to see all of the specific numbers and everything then click on the gallery below and have a look. The only thing that's in the gallery that isn't in the paragraph above is the filters at the end, and there are three because I was trying different ones out. The reason why I decided to add filters is mostly because of the colours that they included. With the one that I chose, I felt that it added more drama to the whole thing by turning the pale shadows of the original image into these moody dark blues.
 |  |  |
|---|---|---|
 |  |  |
 |


There are several things that I particularly enjoy about this piece. Firstly, in terms of the rule of thirds, it works in two ways. The first way is that the subject (the castle) is in the right hand third segment, which intrinsically makes it stand out more. Secondly, the lighting changes between each third segment. For example, the left third of the photograph is dark, the middle segment has a medium lighting, and the right hand segment is fully lit by the sun, which was facing the castle at the time.

The next piece that I liked quite a lot was IMG_1791. This piece stands out quite a lot to me because of all the leading lines that it has, which all lead to one spot in the middle of the archway. These leading lines are created by the repeating of the pillars, lights, doorways, etc, so when you see that there is more repetition past the archway, it creates a sense of mystery because it immediately makes you wander what is past it.


The only edit that I can think about making for this one is a bit of a colour change, this has the same problem as the image before, where it is a bit grey. Also, Maybe the filter that we used before would look nice on this photograph as well.
I think I went a little crazy with the edits with this one, but the end result is good so it was worth it. Firstly, I noticed that the photograph was a bit skew, so I rotated it to the right by 0.5. then, I used the Auto Fix feature, and it picked up on that it was a little too bright, so it brought the light levels down, also applying a bluish tint to it. I then added the same blue filter to the photograph, and liked what I saw. However, I didn't like how dark it was so I took the contrast down a bit, and added some brightness.
 |  |  |
|---|---|---|
 |  |


Overall, I enjoy this piece. I've already stated what I like about this photograph, and fortunately nothing about that has changed. I do like how this photograph contrasts the other one I've worked on so far, in that the previous one was out in the open, and this one is a bit more claustrophobic, in that it is under a roof with walls on each side. Hopefully, the next piece will tie this theme together.

Just as I had hoped, this next image (IMG_1801) really does tie in the last two photographs. In this photo, we see an open area with some sky, but also a roofed area with pillars. This links in with the first image in that it is open and there is a clear view of the sky, but it also links in with the second image because there is still a sense of structure and entrapment with the roof and the pillars. I also like how the rule of thirds is used here, with the tree in the foreground in the left third, and the WWI memorial in the background in the right third. There's one more thing about the next image that I like, and that it subtly follows the Golden Ratio. You can see this if you have a look at the diagram, where it shows you the golden ratio spiral coming off of the tree trunk, curving over the memorial, and then closing on the well lit square that exists as a sort of barrier to the stairs. Like I said, it only follows this rule subtly, but I feel that it is still as effective.


There are a few things that this photograph needs in terms of editing. For instance, like all the other photographs, it could do with a bit more colour. This can be easily fixed by changing the vibrance of the image. I also think that the dark blue filter would look pleasing on this photograph as well. Also, the light reflecting off of the memorial has caused some over-exposure, so I'll see if I can fix that.
I didn't do too many edits here. Initially, I clicked the Auto Fix feature just to see what needed fixing. Then, I changed the brightness and contrast levels to my liking. I also removed the piece of dust from my image using a heal tool, and then applied the blue filter to my image, which finished it off. Unfortunately there was nothing I can do to fix the over exposure problem, but it does create an interesting juxtaposition because the finished image is quite dark but there is a spot with quite a lot of light.
 |  |  |
|---|---|---|
 |  |  |
 |


I think that this piece turned out really well. Again, I've already talked about what I like about the composition of this shot. I do particularly like how contrasting the highlights and shadows are in this one though, it's quite strong.

Looking at these photographs without contextual knowledge could possibly make you think that these are just some photographs, but truly understanding them individually as well as all together will hopefully help you truly appreciate them,
First of all, you need to compare these photographs to the fundamentals of Urban Landscape Photography that I talked about earlier.
I mentioned that you will need to describe a town or city through what is shown through a photograph, and I feel that I achieved that. The first photograph is quite picturesque, including water, foliage, a castle looking building, all lit with a strong sun. I feel that this emphasizes the town's beauty, in that the nature as well as the buildings are all aesthetically pleasing. The second photograph I feel encapsulates the structure and the order of the town, shown through the repetitive patterns (I also feel that this photograph could represent looking to the future and not knowing what's to come, but that's besides the point). The third and final photograph shows off the town's culture, with a large podium used for orchestral music performances (on occasion) taking up the majority of the mid-ground, and a WWI memorial in the background. Even the town's preservation is represented in this photograph through the tree trunk in the foreground, and the various trees in the background.
Secondly, I mentioned that you need to remember that it is representative of an attempt to understand our experience of the city. I feel like I captured this pretty well, through multiple ways. Firstly, I did this by highlighting parts of the town that might not be well known to some other people. Urban Landscape photography is supposed to represent someone's (in this case, my) experience in the town. My experience would differ from someone who has been to this town only a few times, because I have lived in the area for 7+ years as of writing this. With this in mind, I wanted to focus on subjects that are hidden away, and are not common focal points. For instance, the castle is quite a ways away, but because I was zoomed in I created the illusion of close proximity. The archway is located by an alleyway that is fairly hidden away, and ,similarly, the memorial is off the beaten path, so to say.
I also mentioned that you should show dedication to the subject shown through the body of work, rather than just with isolated images, to create more of an effect. I kept this in mind, and that's why I have selected the three images that I worked on to collectively be my final piece.
Lastly, I mentioned that I should focus solely on structures or processes instead of people, which I think I did rather well, with the only people far off in the background of my third photograph.
And with this all being said, I present to you, my final piece (Below. Click to enlarge images).


